
Playrooms Walkthrough and Beginner Guide
Follow Playrooms cleaning progression, choose useful upgrades, prepare for each area, and understand missing balls, collectibles, and blackout risks.
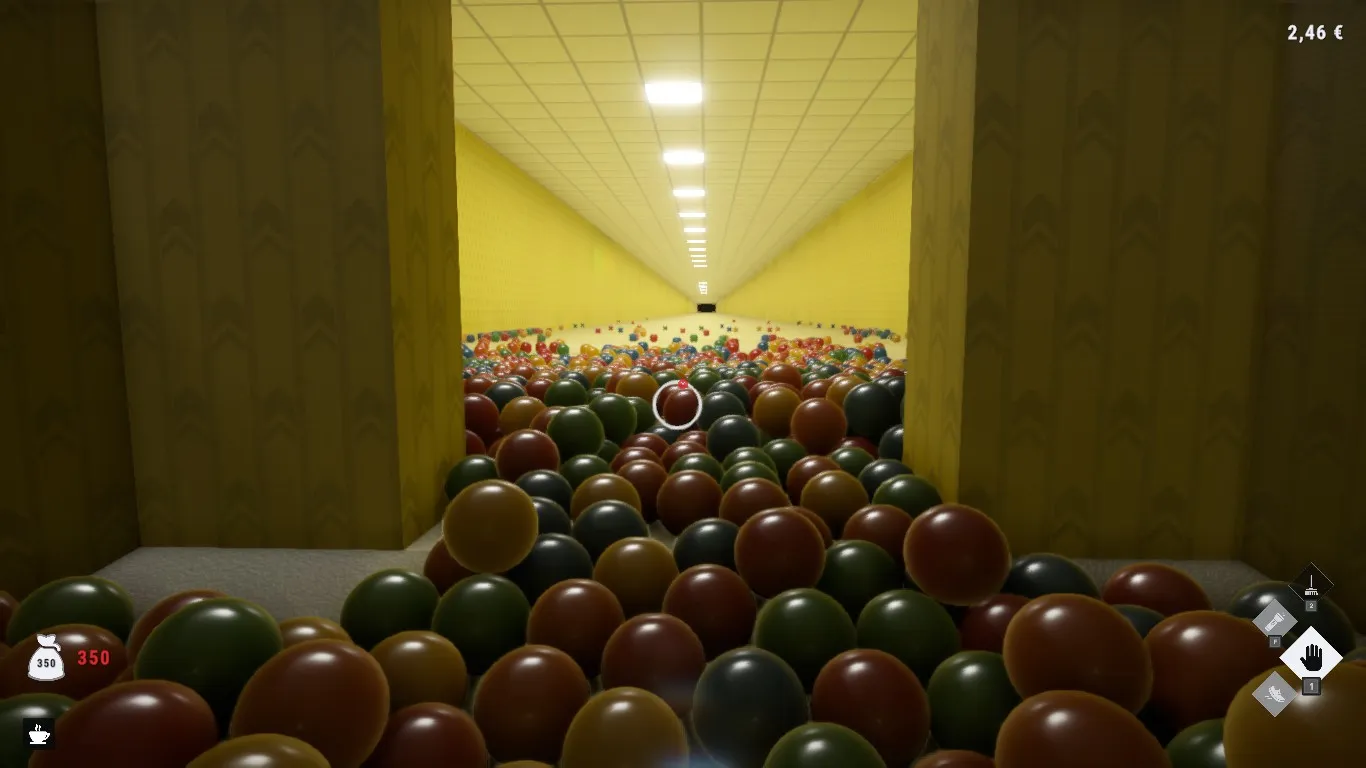
How do you progress in Playrooms without losing a shift?
An overflowing vacuum is little help when the lights go out halfway home. This Playrooms walkthrough explains how to turn scattered balls into upgrades while keeping enough time to reach the break room. Your priorities are to store balls, improve whatever slows you down, and prepare before exploring farther.
This Playrooms walkthrough covers documented cleaning progression through the School’s introduction. It also separates room completion from pit filling and identifies optional collectibles. The reviewed footage does not establish a complete route through the ending.

Playrooms - Episode 1 - Full Game Release! — FalconPlaysGamesOfficial
Video source: Playrooms - Episode 1 - Full Game Release! — FalconPlaysGamesOfficial.
General full-release gameplay reference. This is not a dedicated tutorial, device test, or proof of this article’s particular mechanic. Exact patch is not identified.
The guide concerns Two Pixels UG’s Windows Steam release, dated November 4, 2026, on the official Playrooms store page. The storefront describes more than 200,000 scattered balls, with filled pits unlocking abilities and collection funding equipment and area keys.
Detailed examples below are labeled player experience because they come from an early full-game recording made before general availability. Prices, upgrade limits, and reported bugs may differ in later builds.
The basic working cycle is:
- Start the shift using
light.exe. - Collect loose balls and deposit them into collection pits.
- Return to the break room before darkness overtakes your route.
- Read new messages and purchase available improvements.
- Save for another area when useful upgrades become locked behind progression.
Watch the room’s time display whenever available. Player experience shows that activating the Waiting Area’s monitor reveals remaining shift time, making return trips much easier to judge.

THE BACKROOMS NEED CLEANING, WE'RE THE GUY | Playrooms FULL GAME PART 1 — Sonoket Gaming
Earlier full-game review-copy playthrough — Sonoket Gaming. Published October 30 before public launch. The dated observations attributed to this recording are not a demonstration of the November 6 patch.
Build your first shifts around useful upgrades
Early progress depends on improving manual collection. In player experience, Ball Magnet increases the number of nearby balls collected per pickup, while Big Pockets expands carrying capacity. Pickup and deposit improvements reduce the time spent handling each load.
For this Playrooms walkthrough, choose upgrades according to the task consuming your shift. A larger inventory helps when frequent deposit trips interrupt collection; faster depositing helps when unloading keeps you stationary.
| Upgrade or purchase | Supported effect | When to consider it |
|---|---|---|
| Ball Magnet | Collects additional nearby balls per pickup | Gathering individual balls takes too long |
| Big Pockets | Increases carrying capacity | Your inventory fills before you finish a nearby pile |
| Pickup and deposit upgrades | Improve manual handling speed | Collecting or unloading is slowing each trip |
| Longer Days | Extends working time | Travel leaves too little time for cleaning |
| Sprint stamina and speed | Improve movement after sprinting becomes available | Longer routes consume much of the shift |
| Area keys | Open rooms and associated progression options | Useful upgrades require another area |
These are practical priorities drawn from player experience, rather than a verified optimal purchase order.
Fill accessible pits while building income. The official description confirms that full pits unlock abilities; player experience shows rewards and new workstation options appearing as collection progresses. Read those messages before deciding what to buy next.
Once keys become affordable, consider their effect on existing equipment. In the recording, buying a key opens additional upgrade options even while earlier rooms still contain balls. You can strengthen your tools before returning to unfinished cleaning.
Avoid spending your entire balance immediately before exploring. Player experience includes arriving at a new room’s vent without enough money to activate it. Keep some funds available, and check the price shown in your own game.
Prepare for each room before moving deeper
The observed early sequence is Playroom, Waiting Area, Backroom, Poolroom, then School. This sequence comes from full-game player experience. The recording explicitly notes differences from the demo, so demo progression should not determine your route.
Use this Playrooms walkthrough as a preparation guide: each new area changes how you move balls, navigate, or manage the return journey.
| Area | Documented challenge | Useful preparation |
|---|---|---|
| Playroom | Manual collection across several pits | Improve pickup capacity and establish a short deposit route |
| Waiting Area | Connecting doors complicate sweeping routes | Locate the vent, activate the time display, and check door destinations |
| Backroom | Darker passages and substantial travel distances | Bring lighting, improve movement, and retain funds for the vent |
| Poolroom | Balls occupy water, surrounding floors, and upper areas | Combine sweeping with manual collection and a portable vacuum |
| School | Corridor running restrictions and multiple levels | Read the principal’s instructions and allow more return time |
In the Waiting Area, player experience shows doors connecting different passages, with some leading to collectible spaces. Check where a door exits before pushing a large pile toward it. Clear a usable route to the vent rather than repeatedly moving balls between congested hallways.
In the Backroom, longer travel makes shift duration and stamina increasingly valuable. The recording includes a failed trip to a distant couch, followed by a successful attempt after movement improvements and consumable boosts. Treat that trip as a separate expedition.
In the Poolroom, floating balls still need to be stored. The room’s introductory message explicitly distinguishes balls on the water from deposited units. Manual pickup remains useful where sweeping is awkward.
The School introduces a different movement constraint. Its message prohibits running in corridors, and a later reprimand instructs the player to walk slowly when the principal appears. Do not plan an exit that depends on sprinting through those corridors. The reviewed footage establishes these warnings, but not a complete School solution or the exact consequences of every violation.
Make the broom, vents, and vacuums work together
The tools complement one another. A broom moves large quantities, a vent processes deliveries, and a portable ball vacuum provides another collection point. Robot vacuums add automated cleaning but also need charging and unloading time.
This Playrooms walkthrough recommends matching collection speed to processing speed. If your broom delivers balls faster than a vent or vacuum can handle them, improving the receiving equipment addresses the growing backlog.
| Tool | Role shown in player experience | Relevant upgrades |
|---|---|---|
| Hands | Collect awkward leftovers and load the portable vacuum | Ball Magnet, carrying capacity, handling speed |
| Push broom | Move piles toward collection points | Load, push tempo, sweep width, flick |
| Ball vent | Transfer delivered balls into pits | Suction force, intake reach, intake speed, throughput |
| Ball vacuum | Accept balls and upload them to pits | Intake speed, intake reach, tank size, upload speed |
| Robot vacuum | Collect independently and return to its dock | Battery, tank, motor, charging, unloading |
The portable ball vacuum needs upgrades to reveal its usefulness. In player experience, the first intake-speed level enables suction mode. Before that discovery, the player initially mistakes it for little more than extra storage.
Place it on clear floor near the work area. The recording shows placement failing on top of a pile, then succeeding after a space is cleared. Feed it with manual pickups or sweep balls within reach.
When the tank remains full, consider upload speed. A larger tank accommodates more balls, but upload improvements address slow transfer into pits. Check both intake and upload behavior before choosing the next upgrade.
Deploy robot vacuums where they can reach loose balls and return to their docks. Player experience shows repeated repositioning and charging interruptions reducing their usefulness. Start them working early, then handle another nearby task.
One release change matters when following older footage: the developer’s official launch announcement confirms that players can carry two tools at once. Earlier carrying limitations in the recording should not be treated as current universal restrictions.
Find missing balls and plan collectible trips
A full pit and an empty room are separate milestones. Community reports say there are more loose balls than total pit capacity, allowing all pits to be filled without collecting every ball. Clearing rooms remains relevant to achievements, according to the reviewed community discussion about pit capacity.
For the cleanup stage of this Playrooms walkthrough, use IS-95 inventory recording, the scanner shown in player experience. It highlights nearby unstored balls and has a recharge delay. Its limited range means one scan does not establish that an entire area is empty.
Check corners and adjoining spaces systematically. In the recording, finding a single overlooked ball eventually triggers the Waiting Area’s completion achievement.
The community guides list 20 sparrows and 14 collectible items across seven areas. These are community reports, and the room assignments below are a checklist rather than exact pickup directions.
| Area | Sparrows listed | Collectible items listed |
|---|---|---|
| Playroom | 4 | Toy Block |
| Waiting Area | 2 | Bookshelf, Gramophone |
| Backroom | 3 | Coffee Table, Three Seat Couch |
| Poolroom | 2 | Telescope, Armchair |
| School | 2 | Wall Clock, Copper Icosahedron |
| Hotel | 4 | Television, Abstract Sculpture |
| Office | 3 | Feeding Bowl, Desk Plant, Tall Plant |
The reviewed Sparrow Locations guide and Item Locations guide support these assignments. Both describe changing Hotel room positions, so a fixed hallway route should not be assumed.
Reserve distant collectibles for shifts with suitable movement upgrades. The item guide reports approximately three minutes for the couch round trip with maximum stamina and a coffee boost. That is a community estimate for that setup, not a guaranteed travel time.
Under-floor balls require a separate caveat. Early player experience shows Poolroom balls trapped beneath the floor. Reloading, starting another day, and using the player’s unstuck option did not resolve that instance; careful broom movement recovered only some balls. The reviewed evidence does not confirm whether the problem persists after subsequent patches. It also does not support promising a reliable workaround.
Related guides
- Beginner Guides directory
- Playrooms Tools, Ball Vacuums, and Cleaning Robots
- Playrooms Upgrades and What to Buy First
Playrooms walkthrough FAQ
Do you need to sort balls by color?
Color sorting is unnecessary for the basic cleaning progression shown in player experience. However, the official launch announcement confirms a color-sorting achievement. Older commentary claiming that sorting is impossible should not override that announcement.
Does this Playrooms walkthrough cover the ending?
No. It covers documented early cleaning progression, equipment use, and preparation through the School’s introduction. Community guides identify Hotel and Office collectibles, but the reviewed material does not establish their complete progression routes or an ending solution.
What happens if you stay outside after the lights go out?
The official description warns that darkness is dangerous. In the recorded Normal-mode player experience, being caught restarts that day and loses progress from the failed attempt. The storefront describes different danger settings, so that outcome should not be assumed for every mode.
Should you finish an entire room before buying another key?
Player experience shows that you can buy another key while an earlier room remains unfinished. Doing so can unlock useful upgrades for returning to that room. Balance the key purchase against equipment improvements and any activation costs you encounter in the next area.
Related Articles
community
Playrooms Gameplay and Official Trailer
See how Playrooms gameplay combines ball cleanup, tool upgrades, and timed horror, with full-game footage context and launch details.
guides
Can You End the Day Early in Playrooms?
Can you end a Playrooms shift early? Learn why the door trick is disputed and what community reports say about PC access, saving, and waiting.
guides
Playrooms Controls for Keyboard and Controller
Check confirmed Playrooms controls, demo keyboard inputs, controller support, Y-axis inversion evidence, and the November 6 input fixes.
Was this helpful?
Thanks for the feedback!